Ray Tracing in One Weekend
I was reading the excellent Ray Tracing in One Weekend and decided to give it a try with my voxel engine/editor. The book uses spheres as primitives for a scene, but I wanted to use voxels.
How it works
A ray is launched from a camera to each pixel on a screen, intersection with a scene is found, we calculate where this ray will go further. For a diffuse surface, a ray is scattered in a random direction, metal surfaces reflect a ray, glass reflects or refracts it. Better explanation is in the book.
Ray casting
Performance of ray tracing depends on how fast is your ray casting - there are multiple techniques to optimize it - hierarchical bounding volumes etc. Luckily, the engine already had world trace function, which was used for surface editing, although it was inefficient.
So the first thing I implemented was modification of Bresenham’s line algorithm for tracing, similarly to Wolfenstein 3D, but extended to 3D. Here is a good explanation of a raycasting used in Wolfenstein - basically you incrementally jump from voxel to voxel looking for a first solid voxel. If a voxel is solid - we found our intersection. As the voxel field is split to 32x32x32 voxel clusters, we can skip empty clusters to optimize a tracing. Same technique is used to jump between clusters. Only 2 conditions and 2 floating point addition is used in the internal loop for both clusters and voxels.
Shading and Lighting
After that I switched to actual rendering - basically re-implemented shading described in the book in 300 lines of code. Ray tracing is a quite powerful technique, allowing you to render a picture quite close to reality with few lines of code.
For calculating sun lighting and shadowing, I used importance sampling, similarly to the idea from Ray Tracing: The Rest of Your Life.
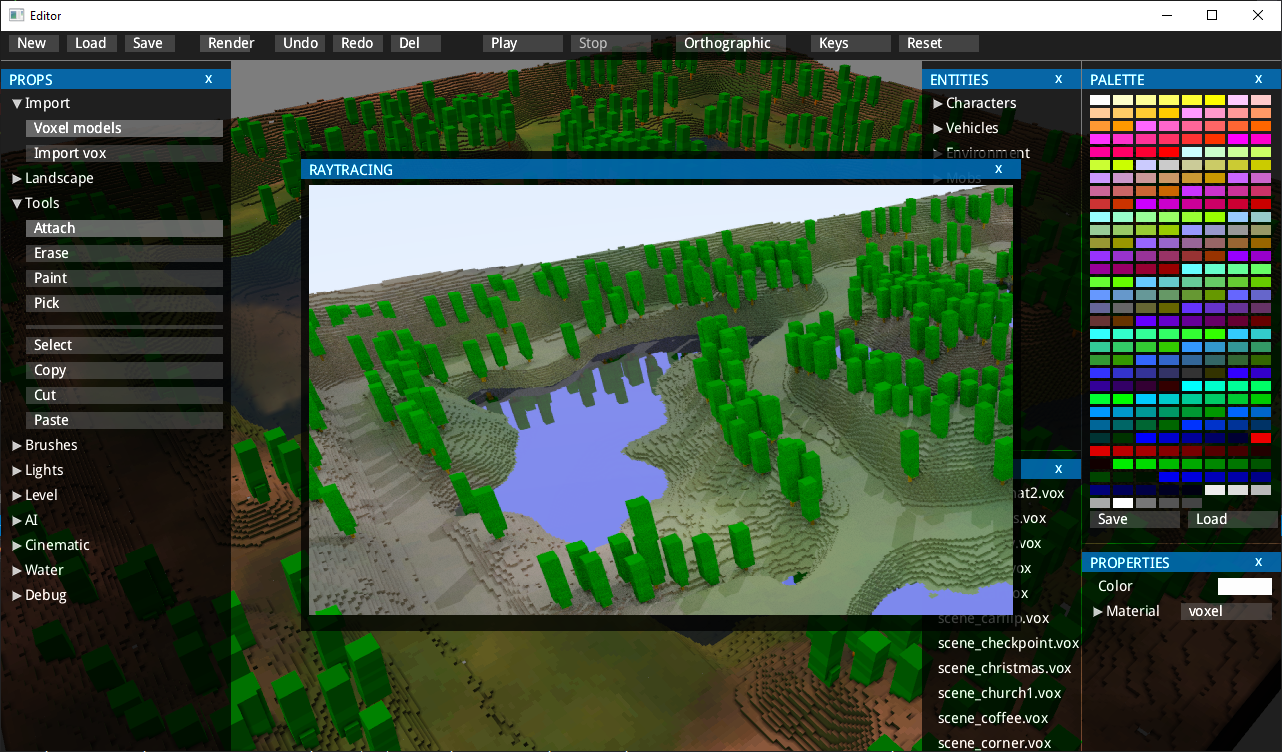
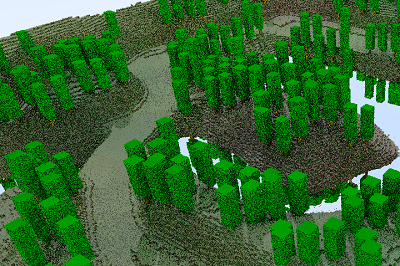
One of the first images (using free voxel scene by Mike Judge):

Optimizations
Initial implementation was slow - 0.4M ray per a second, several minutes to render 720p picture with 100 samples per pixel, so I decided to optimize it, applying obvious solutions:
- multi-threading - rendering an image using several threads by collecting resulting colors in a single floating point buffer - it helps to get initial picture really quick.
- cleaning profiling/debugging code - trace() function is called million times, so removing everything with a mutex helps a lot
- better random number generator: from the article by Aras.
Random number generator and multi-threaded rendering was a pain initially - I spent couple of hours trying to understand why the picture rendered with 100 pixel per sample looking so bad:
The answer was quite interesting - basically random function generator in C++ uses math algorithm to get next random number and you need to call srand() to initialize the generator in each thread! The random number generator is used to shift a ray in a random direction for each sample, but without srand() it was just going in the same direction, so each pass produced identical image.
Conclusion:
I was able to optimize ray tracing from 0.4M rays per a second to something around 5M rays per a second with a couple of tricks. Further optimization could be tricky. One possible solution could be using Intel® Open Image Denoise which helps to render with a fewer samples per pixel and run denoiser on top.